
DIY Doilie Pumpkin

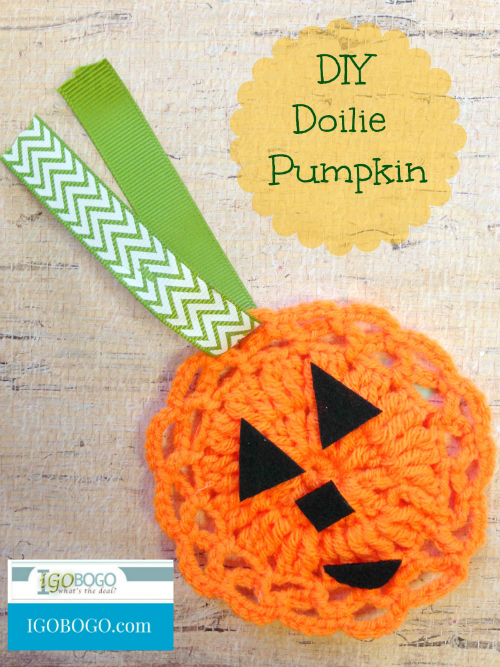
Making your own pumpkin is easy when you craft this sweet and simple DIY Doilie Pumpkin. We created the one you see here using a few supplies from our local craft store, and it only took a few minutes. Kids will love this craft, as they can get as creative as they wish with the face and details. Take a peek below at how we created our own doilie pumpkin. This is a frugal fall craft you won’t want to miss out on.
Supplies needed:
Small orange doilie (sold 2 for $1 at Michael’s craft store)
Black felt
Scissors
Craft glue
Green ribbon of your choice, thin

Directions:
1. Begin by using the black felt to create the facial features of your pumpkin. You can cut out squares, circles, triangles, etc. Arrange the shapes on the face to get an idea of how you want to attach them.
2. Add a dab of glue to the back of the felt shapes and press them to the orange doilie. You will see the face of your pumpkin coming to life. Continue the process until all of the shapes are glued in place.
3. String a piece of green ribbon through the doilie. This ribbon will not only look like a stem on your pumpkin, but it will also act as a hanger.

Your doilie pumpkin can be hung anywhere you please. For as cheap as they are to craft, you can make a few and create a whole patch of doilie pumpkins. Kids will love making their own little doilie pumpkins, and you will love that you can create this craft on a dime.
Gather your supplies and give these DIY doilie pumpkins a try. They are the perfect way to celebrate the arrival of the pumpkin season…for less!